Pages

Showing posts with label nightstand. Show all posts

Saturday, April 10, 2010

WIWW: Nightstand Materials list

I have finished the design of our first project an easy to build nightstand.  The nightstand is dimensioned for a room at the beach house I am helping makeover.  However you can make it any size you would like.  It is 13 3/4” Wide x 16” Long x 23 3/4” Tall.  You can build it with or without the bottom shelf.  I have designed this to use 2”x2” legs.  I have had a difficult time finding 2”x2” Pine Legs so I am going to use 2”x2” Poplar legs for mine.  I am going to be painting mine white so it doesn’t matter that the wood is different.  An option you could use would be to use 2”x4” Studs as the poplar 2”x2”x36” are about $5 a piece and you can get the studs for $2 a piece and get all 4 legs from 2 2x4’s.  If you use 2”x4” Studs you will want to turn the wide edge to align with the longest side of the table.  This way when you look at the nightstand from the front you get a narrower leg. 

This is really up to you, as you can orient them any way you would like, however typically when building furniture you want to balance the symmetry or the piece so wider widths tend to line up with each other and likewise for the narrower widths.  If you are interested in seeing a diagram of this let me know and I will draw it up and post the picture.  Just let me know.   I am going to suggest you build this with pine to keep costs down and the pine boards from a Lowes/Home Depot tend to be straighter than the cheaper whitewood you can also get.

WIWW_NS_FINAL

Okay let’s get to the materials and tools list.

Materials:

2 – 1”x3”x72”(6ft) Boards
2 – 1”x2”x72”(6ft) Boards
4 - 2"x2"x36"(3ft) Poplar or Pine if you can find it or 2 - 2"x4"x96(8ft)" Studs

Suggested tools:

10” Miter Saw
Random Orbital Sander (ROS)  You will also want 120grit, 150 or 180grit and 220Grit.
Speed Square or Framing Square

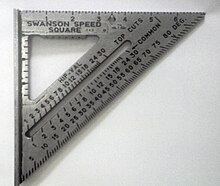
Image Courtesy of Wikipedia.org


Kreg Jig

*If you are going to use a Kreg Jig on this project you will want to use the coarse screws since pine is a softer wood.

Wood Glue: I use Titebond III but I know a lot of people use Gorilla glue.  I have yet to use it.  Maybe one of these days I will break down and get some and give it a try. 

** Clamps:  How could I have forgotten these….    You will want to have at least 2 - 24” Clamps.  We will need these clamps to keep the top tight while the top glues.

***If you would prefer not to use clamps I can show you how to use the Kreg Jig to edge join the top boards.  Clamps can get expensive but you will need them if you are going to do lots of projects.  I don’t think you can have to many clamps.

I believe that should get us started with this build. 

If you have any questions make sure to comment below or shoot me an email.

Have a Great Day!

Sunday, January 31, 2010

Bedroom Makeover: Nightstand Edition

So it is now time to make over our bedroom.  It’s still in the drab white that was painted with the house built.  In an effort to maximize our dollars we decided to give our current bedroom suit a make over.  There are several things wrong with it all of which I will fix over time but the first thing that hits you is it’s just plain ugly.  We still haven’t totally figured out why we bought it 10 years ago.  I guess we were young it was in our budget and we needed furniture for the house we had just moved into.  That being said how do you take a 10 year old not so good looking night stand and bring it into the new decade.  Let’s explore this in a little pictorial.


The ugly nightstand
The Ugly Nightstand, Bedroom Makeover and refinishing
I guess really it’s not all that bad but it is far from our current taste in furniture and design.  I have some ideas on how I would like to fix this guy.  The first thing that needs to happen is that I need to remove all that molding next to the drawers.  I just think it really disrupts the look of the nightstand.  So what to do…..   Find one chisel well two actually and one hammer and presto you get the following result.

The Ugly Nightstand Molding Removed
IMG_3291_1024x768
Now how did I do this?  It is not that hard really.  The molding was nailed and glued in place and my goal was to have as little tear out as possible so take one of our chisels and place it on the back edge of the molding and start tapping it breaking the glue joint and prying the molding away.  Take your time and do a little bit at a time.  You are most likely going to get some tear out, not to worry we will address that in a minute.  Eventually you will be able to pry the moldings off of the project and you get to take a cool picture like this one.


Demolition Tools
IMG_3292_1024x768
As  you can see the moldings don’t always come off in one piece no problem I had not planned on using them for anything anyway.  Now we can address any tear out that may have occurred.  There are at least  two ways of dealing with it.  One if you are planning to paint you can fill any of the tear out with wood putty if they are really bad, do this before you start any sanding, let the pudding try and sand it flush with the rest of the wood.  Now if you are going to stain the project then the putty isn’t probably a good idea as the stain at least in my experience will be soaked up more and look different than the rest of the wood.  If you are in this situation or if the tear out is not all that bad then you can do what I did.  I sanded the faces down until most of the tear out was gone and anything that was real deep I smoothed out with the sand paper and made them appear and part of the character of the project. 


A Sanding we will go…..
IMG_3293_1024x768
Here is the result of a few couple of hours of sanding.  I wasn’t worried about totally removing all of the finish that was on the nightstand previously.  I mainly wanted to get it scratched up real good so that the latex paint I am using would have something to grab a hold of and stick to.  If you can get it to bare wood all the better but I didn’t find it totally necessary on this project refinish.

 
And now through the power of the internet we have a mostly refinished nightstand.
IMG_3295_1024x768  This is the first of 2 coats of Satin Black latex paint.  I wasn’t worried about overspray so I didn’t mask off the interior of the nightstand.  Now that the main part of the night stand is taken care of lets focus quickly on the drawers.  Remove the hardware sand as you did with the main section and paint.
IMG_3288_1024x768 IMG_3296_1024x768
You can paint the sides if you want to, I decided it wasn’t needed as the drawers are closed 99% of the time.
Now that you have everything painted you can either put the hardware back on and be done or you can distress things just a little.  I spent a little time sanding off the paint in some key areas.  It is pretty hard to tell from the picture but there are several distressed areas.  I took the sand paper and sanded until I got bare wood and then took a little stain and stained over the area let it dry for just a little while and wiped the excess away.  Once I was done I had the following refinished nightstand.
IMG_3300_1024x768

So I hope you have fun taking on your own refinishing project.  If you have any questions please feel free to email.

Here is a before and after side by side:
IMG_3285_1024x768 IMG_3300_1024x768

Have a great day!  --Grover