


Computer issues and a tight schedule have kept me from the computer of late. Hoping this tutorial is not too late for some of you.........but then again, the design principles shown here could also be employed for interior arrangements set into floral foam. Well, enough "disclosures", let's move onto the the creation of a traditional winter arrangement

My favorite is the spruce tree toppers. They add the element of height and bulk

Inserted straight up, a cluster adds an instant base

Dogwood sticks; red, yellow, etc. continues the element of verticality

Additionally set in an upright fashion

As we move on the best advice I can impart is, use a variety of evergreen forms and textures. For example if all evergreen bundles chosen have a similar needle, say all small like the spruce, nothing would "pop". A great choice here is the long needle of white pine to contrast with the short needle of the spruce.

Beginning at mid-level onto the bottom, insert at a 90 to 45 degree angle as you begin to fill these lower gaps
(all creations will have a Dr. Seuss look mid-point, don't worry!)
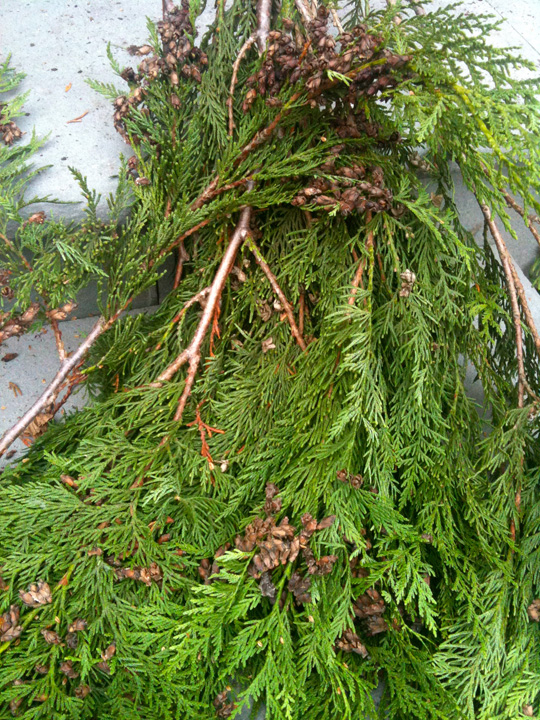
LOVE coned cedar! Another texture, form (droopy) and the addition of mini cones

All inserted at the rim of the urn as a "spiller"

A few set at a 90 degree angle to bring the coned ends higher towards eye level

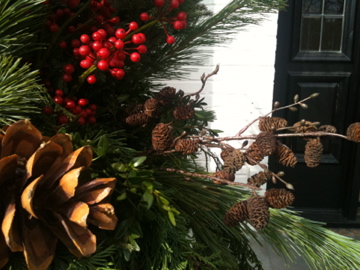
Whopper cones, the "jeffrey" cones.


My "have to haves", red berries and in this case, hard plastic red berries for season long impact. Actually, many seasons...... Try to avoid styrofoam, they burst and will look like popcorn mid winter. The real winterberries soon turn black and drop


Real alder cones on faux stems. Why faux stems? To hold the clusters of diminutive pinecones. Another benefit of faux is the pliable stems


Boxwood. A great mid filler and another contrasting texture

Always stepping back, I will tend to add more of the previously used until satisfied. Does this help? Don't be timid, and have fun!
General Tips;
1) buy twice as much as you think you will need
2) think "filler", "thriller" and "spiller"
3) Use opposing textures
4) When complete, mist with water and then an anti-dessicant, such as 'wilt-pruf', it holds in moisture and adds double the lifespan of your creation
I would love to see your efforts, send me photos
Debra

0 comments:
Post a Comment